How to Configure SAML 2.0 for Extic
This setup might fail without parameter values that are customized for your organization.
Please use the Okta Administrator Dashboard to add an application and view the values that are specific for your organization.
Read this before you enable SAML
日本語の設定手順はこちら(https://www.exgen.co.jp/extic/Okta-Setting_ja.html)
Prerequisites
- Enable External IdP Authentication Option
Supported Features
- SP-initiated SSO
Okta Configuration steps
- Log in to Okta as administrator
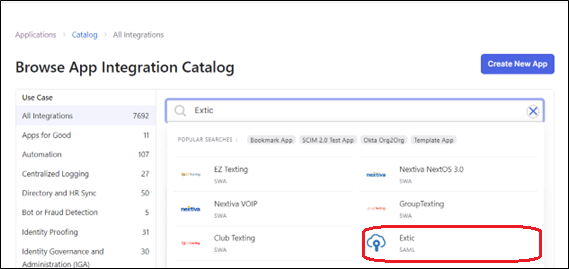
- Applications-Browse Menu Selection
- Click Browse App Catalog button
- Search Extic
- Click Extic
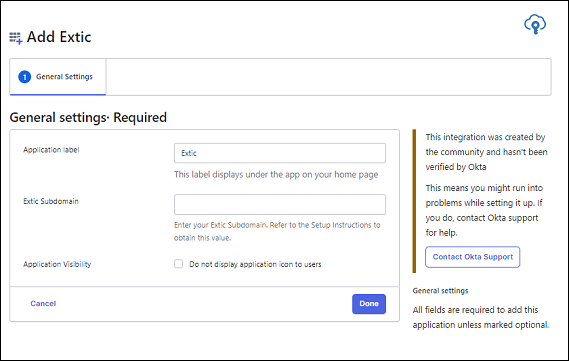
- Click Add Integration

- Input Application label
- Input Extic Subdomain
- Click Done
- Click Assign and select the users or groups you want to grant access to
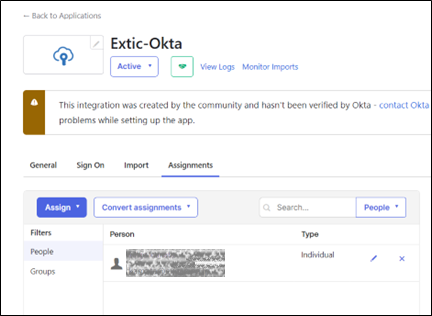
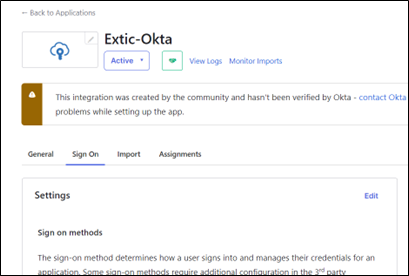
- Click Sign On
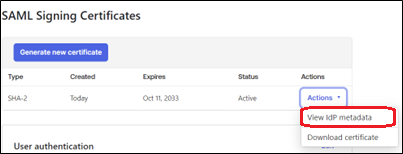
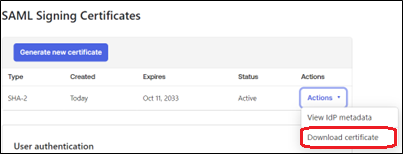
- SAML Signing Certificates – Actions Selection
- Click View IdP metadata
- Set entityId and Location to Extic
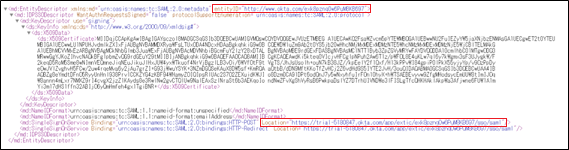
- Set entityId and Location to Extic
- Click Download cettificate
- Set the certificate to Extic
- Set the certificate to Extic
- Click Edit
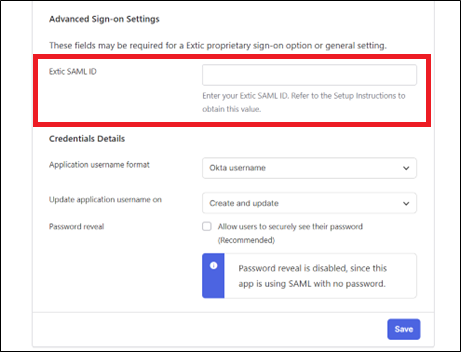
- Enter the Extic SAML ID obtained from Extic
- Click Save button
Extic Configuration steps
- Apply to the Support Center to use the external IdP authentication option
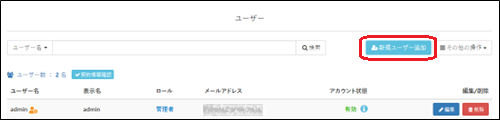
- Log in to Extic as administrator
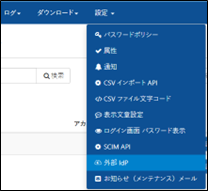
- Configuration - External IdP Authentication Menu Selection
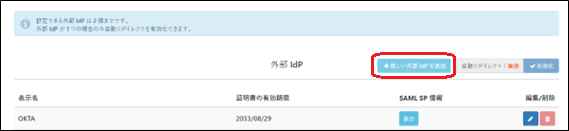
- Click Add New External IdP button
- Input display name
- Input of SAML entity ID obtained from Okta
- Input the endpoint URL of the SAML IdP obtained from Okta
- Upload the certificate (.pem extension) of the SAML IdP obtained from Okta
- Click the Save button

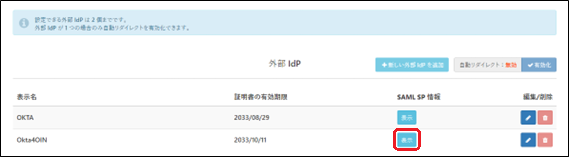
- Click on the SAML SP Info button
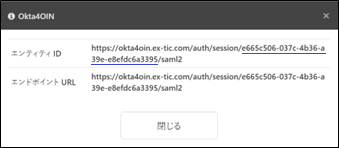
- Set Extic SAML ID to Okta
https://xxx.ex-tic.com/auth/session/Extic SAML ID/saml2
- Click on User Menu

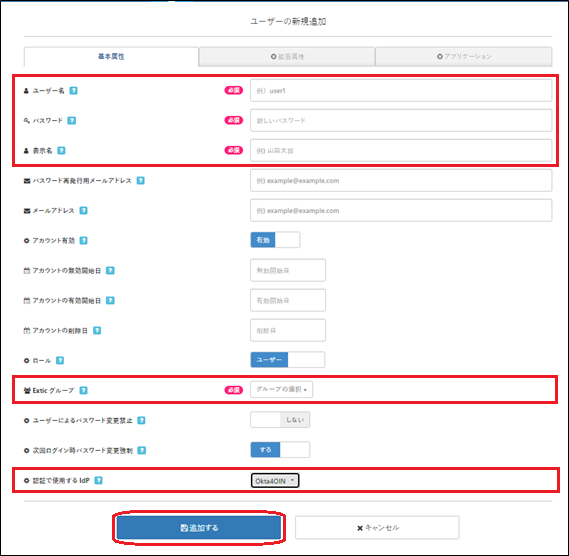
- Click the Add New User button
- Fill in the required fields and select the IdP you have set from the IdPs to be used for authentication, then click the Add button.
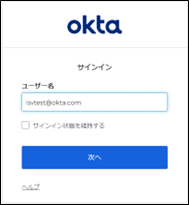
- Go to https://<subdomain>.ex-tic.com/, enter your user name and click the Next button.

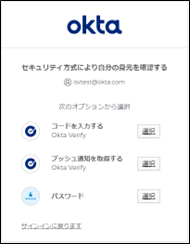
- You will be redirected to Okta's login screen for authentication.
- The Extic top screen appears.
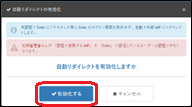
- If you do not want to display the Extic login screen when logging in, register only one external IdP setting and click the automatic redirect button.
※Make sure the administrator can log in using an external IdP before setting up.
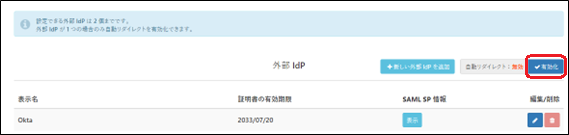
- Click the Activate button
Troubleshooting and Tip
- If you want to enable external IdP auto redirection, Make sure the administrator can log in using an external IdP before setting up.
- The initial administrator cannot use the external IdP authentication function. (Can only log in with Extic)